How to Create an Accessible Website with Storyblok
Storyblok is the first headless CMS that works for developers & marketers alike.
If you want to build and maintain an accessible website, there are several steps you need to take at the start of the project and on an ongoing basis. It’s important to be aware that while it’s never too late to start implementing accessibility, things are a lot easier when accessibility best practices and requirements are implemented from the beginning.
In this article, we will share how to make your website content accessible and how to make your editors' lives easier in bringing that content to market.
The role of the CMS in the accessibility of your project
Even if your website is built with accessibility in mind, it’s equally important to ensure that all content added by editors meets accessibility standards. Accessible content not only supports users with accessibility needs but also improves usability for a wide range of audiences.
Your content management system (CMS) plays a key role in creating accessible content. With the right features in place, it can guide content creators and editors — even without technical expertise — to create content that follows accessibility best practices from first use.
Headless vs. monolithic: what’s best for accessibility?
A monolithic CMS comes with predefined features, so you have to rely on what’s already there. Even though you might also be able to extend the basic functionalities with accessibility-based plugins, you won’t have much flexibility unless you want to build your own plugin to extend the core functionalities, which might be expensive in terms of resources.
On the other hand, a headless CMS gives you way more flexibility to define structured content from the start, making it easier to build accessibility requirements directly into content models.
How to make your content accessible using Storyblok
There is no single solution that works for every website, because accessibility touches many different aspects. Depending on the structure of your project and what accessibility features you want to include, your setup will vary.
With that said, we are going to look at some examples of how you can configure the structure of your content in Storyblok to implement fundamental accessibility features.
1. Prevent editors from writing markup
Since Storyblok is a headless CMS, it's important to ensure content is completely decoupled from presentation. Consequently, we need to ensure that editors don't include HTML in their content. Any HTML written by a human author is not maintainable, as other team members lose visibility or access to it.
For the above reason, you should educate your editors to avoid it. The HTML code should live entirely within your frontend code, which fetches the content from Storyblok. If you want to make sure that you are not outputting any HTML that might have been included in the content, you can also use the functionalities of the language you are using in your project to strip any HTML tags from the content.
2. Maintain hierarchical headings
Headings are important for informing users and assistive technologies about the structure of the page's content. Assistive technologies can use them to provide in-page navigation and ensure users can access the available information, so it’s crucial to use them appropriately.
Headings should always be used in a logical order, from the highest to the lowest level, without skipping levels, as this helps users understand the content's structure. Heading levels should reflect content hierarchy rather than visual design choices, ensuring easy reading for humans and assistive technology.
Additionally, one important rule is to ensure there is only a single H1 per page. If the H1 is generated in code, you have to remind editors of this rule or prevent them from selecting H1 to avoid confusion and accessibility issues.
Editors can typically insert headings through markdown fields or rich text editors. If more control over the types of headings that can be used in a field is needed, use the rich text editor, as that allows you to select the formatting. You can also control the output of the rich text editor by stripping or transforming any H1 tags that might have been copied and pasted into the field from an external source (such as Google Docs). For this purpose, you can generate a custom schema (opens in a new window).
3. Use accessible iframes
Iframes are widely used for several purposes, and one of the most common is to embed a video from an external platform like YouTube or Vimeo on a page. Embedding videos from widely used platforms also ensures you have the right, accessible keyboard controls for your video content, which is very important for many users. A good practice is to add a title attribute to the iframe that describes its content.
Storyblok can help you with this task very easily. You can create a nestable component called “video_embed,” with two required text fields: one for the video URL and one for the title.
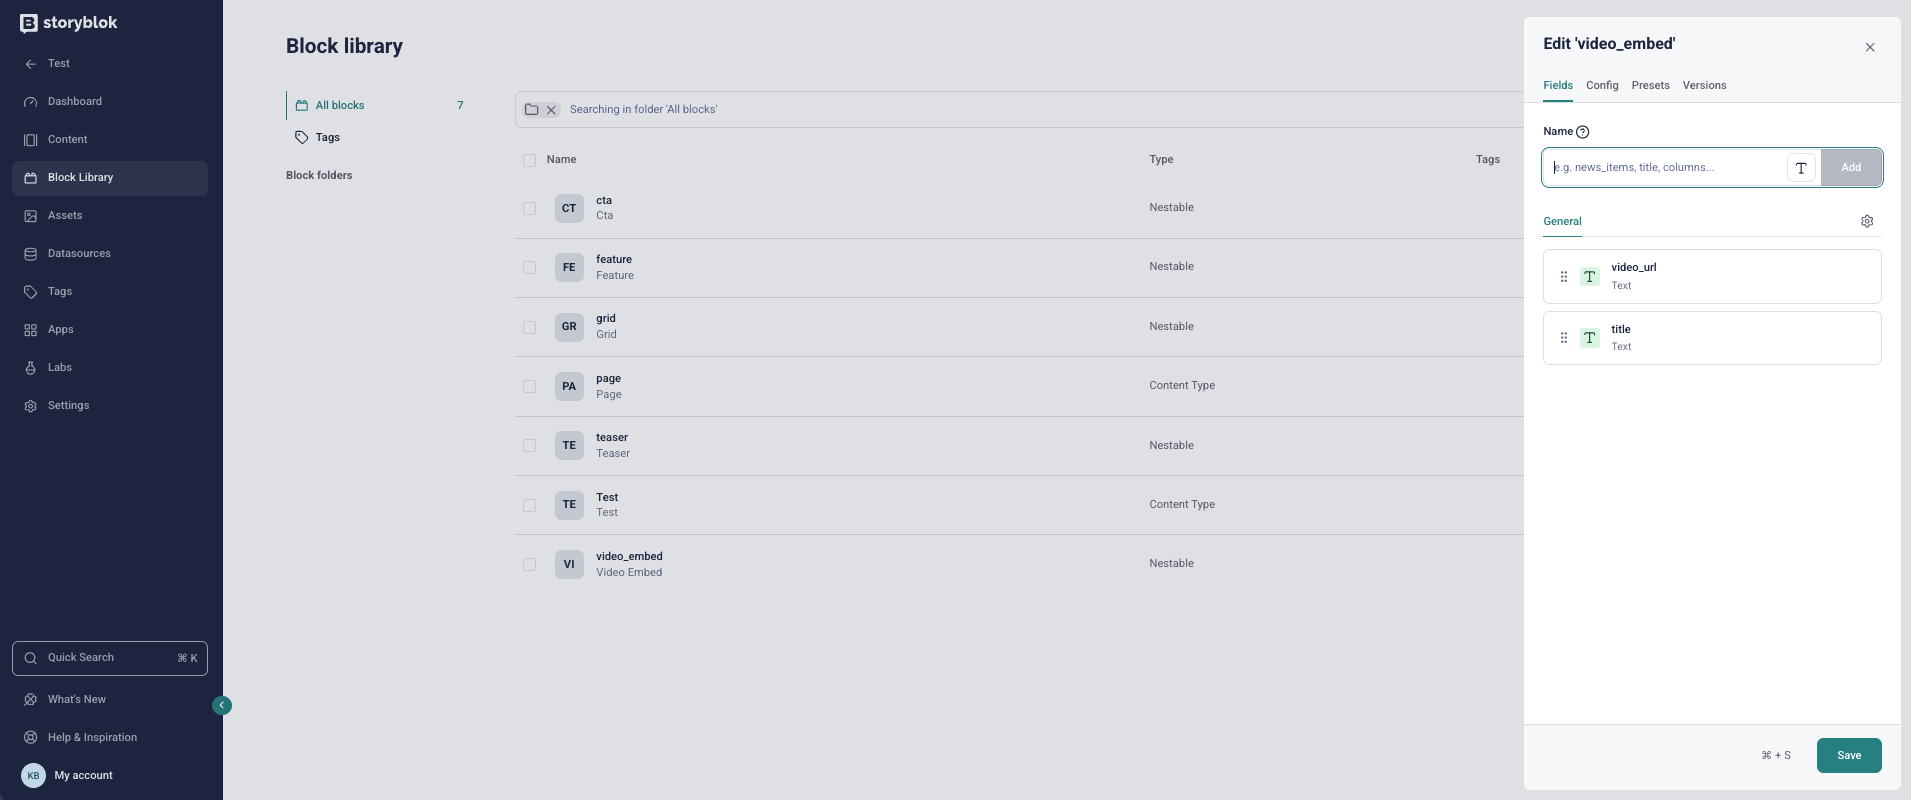
In your code, you will then use both fields accordingly so that the output will be something like:
<iframe src="https://youtube.com/22121" title="This is the title field">You can use the same criteria with any type of iframe you will be using in your project. You can also use such components in a rich text field because that field type allows you to insert components inside the text.
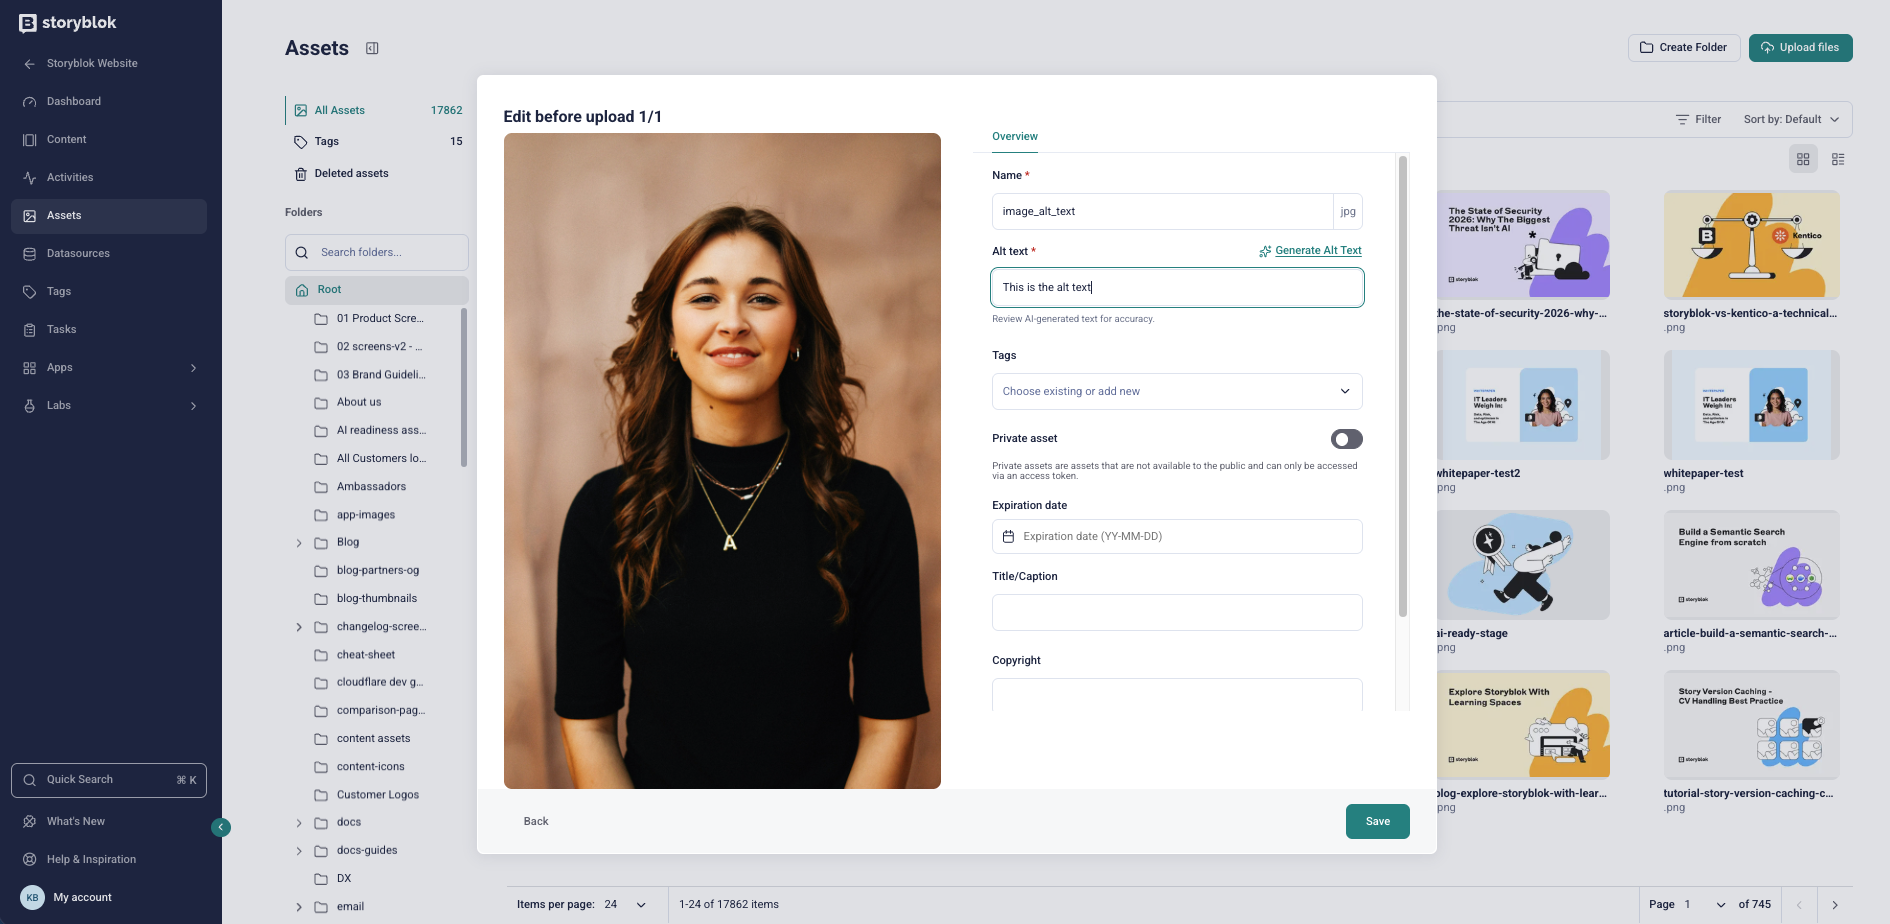
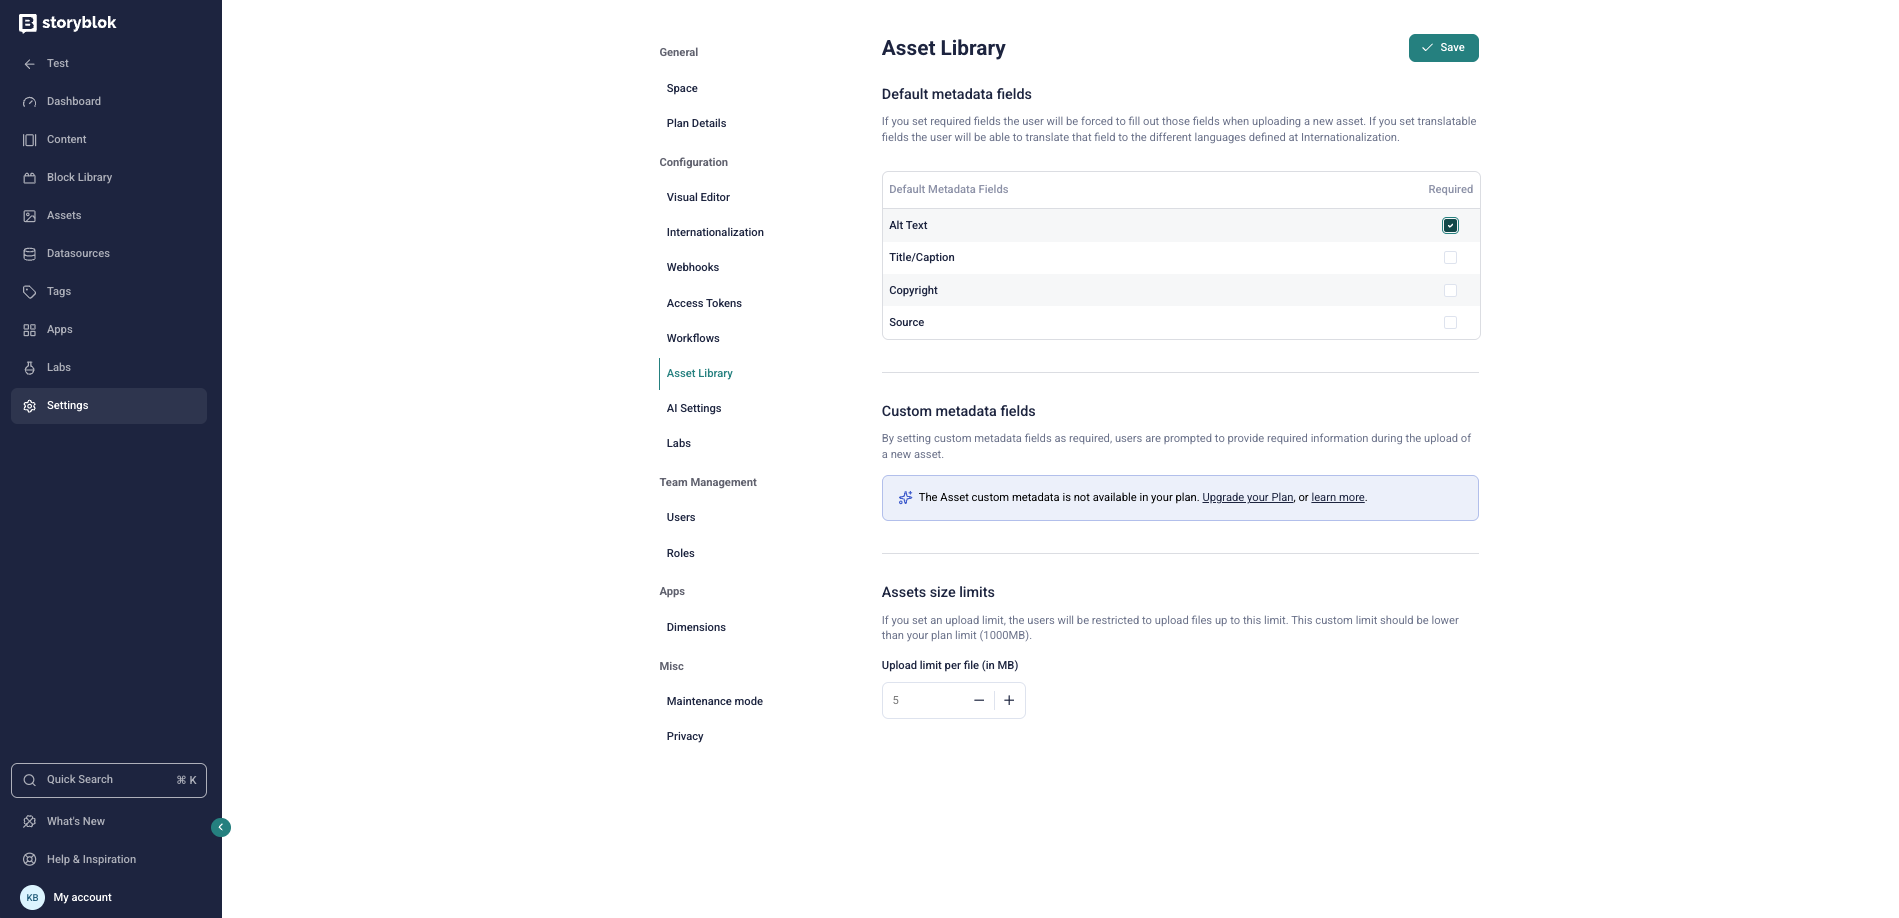
To define the alt text as mandatory, open Settings → Asset Library, and set the Alt Text option (1) as Required.
4. Take care of color contrast
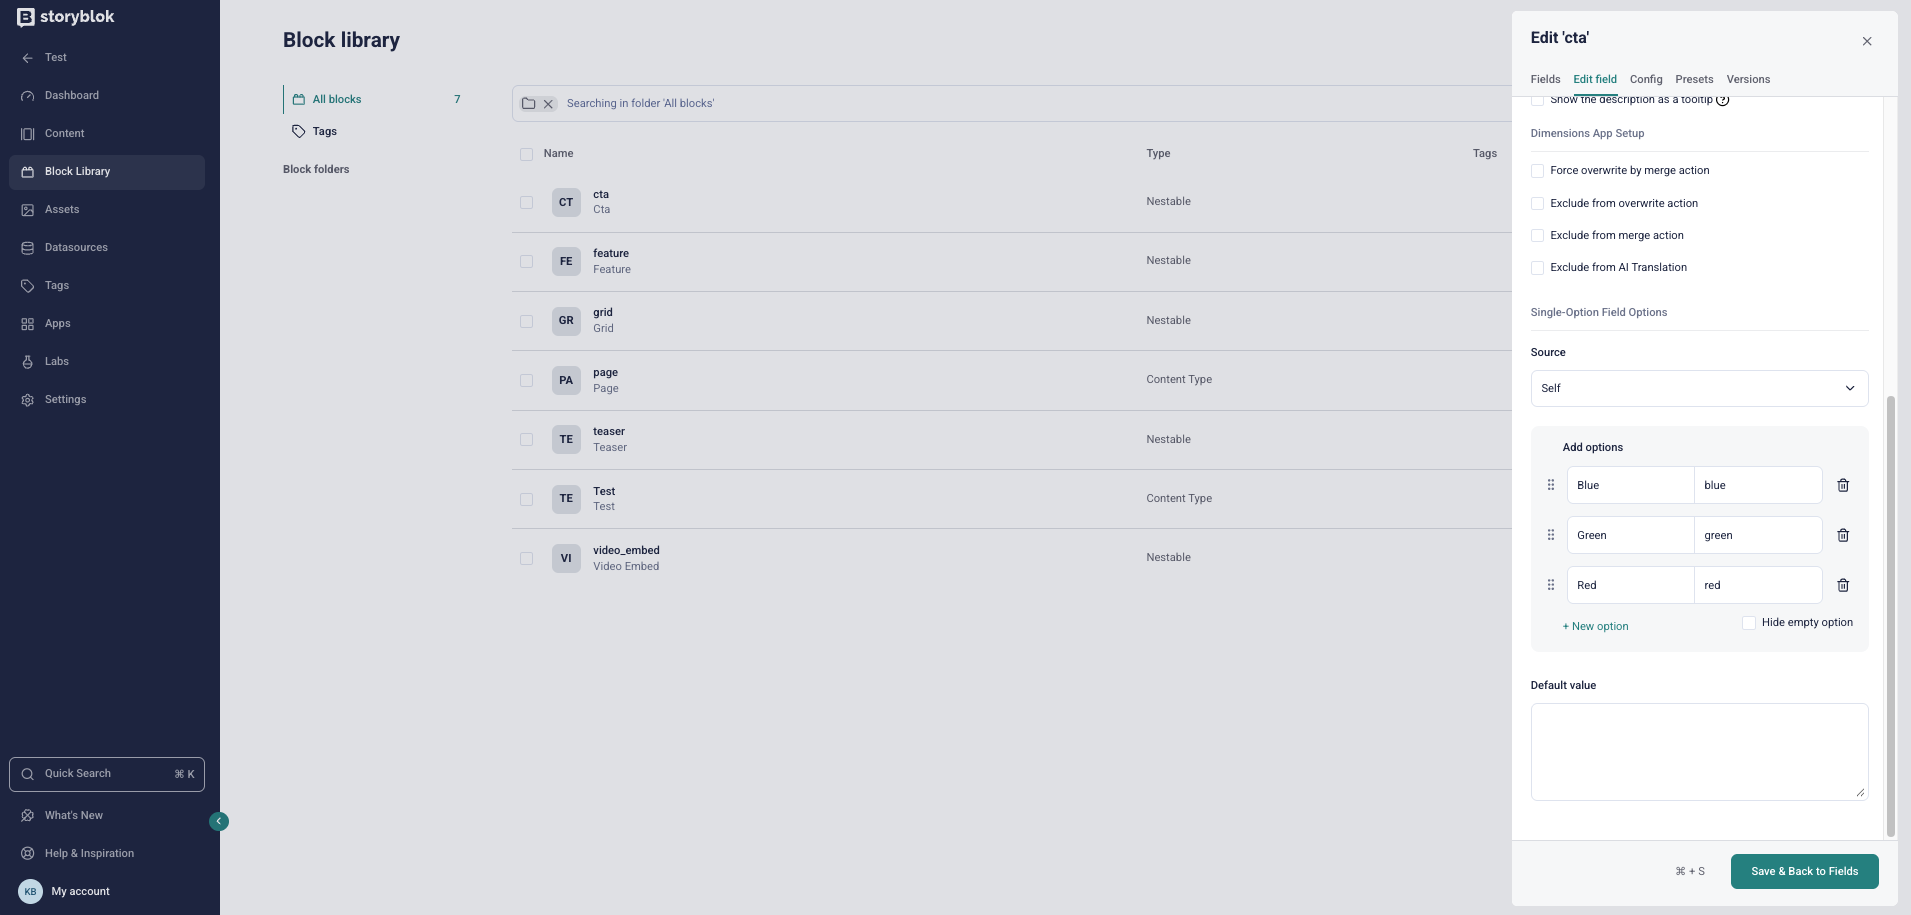
Color contrast is important as that allows your users to view the content correctly. Suppose some of your components support custom colors for their elements, for example, the background or text. In that case, you have to make sure that editors don’t pick colors that go against your style guide or result in low contrast or overly bright items on your pages, which won’t be usable for users with visual disabilities.
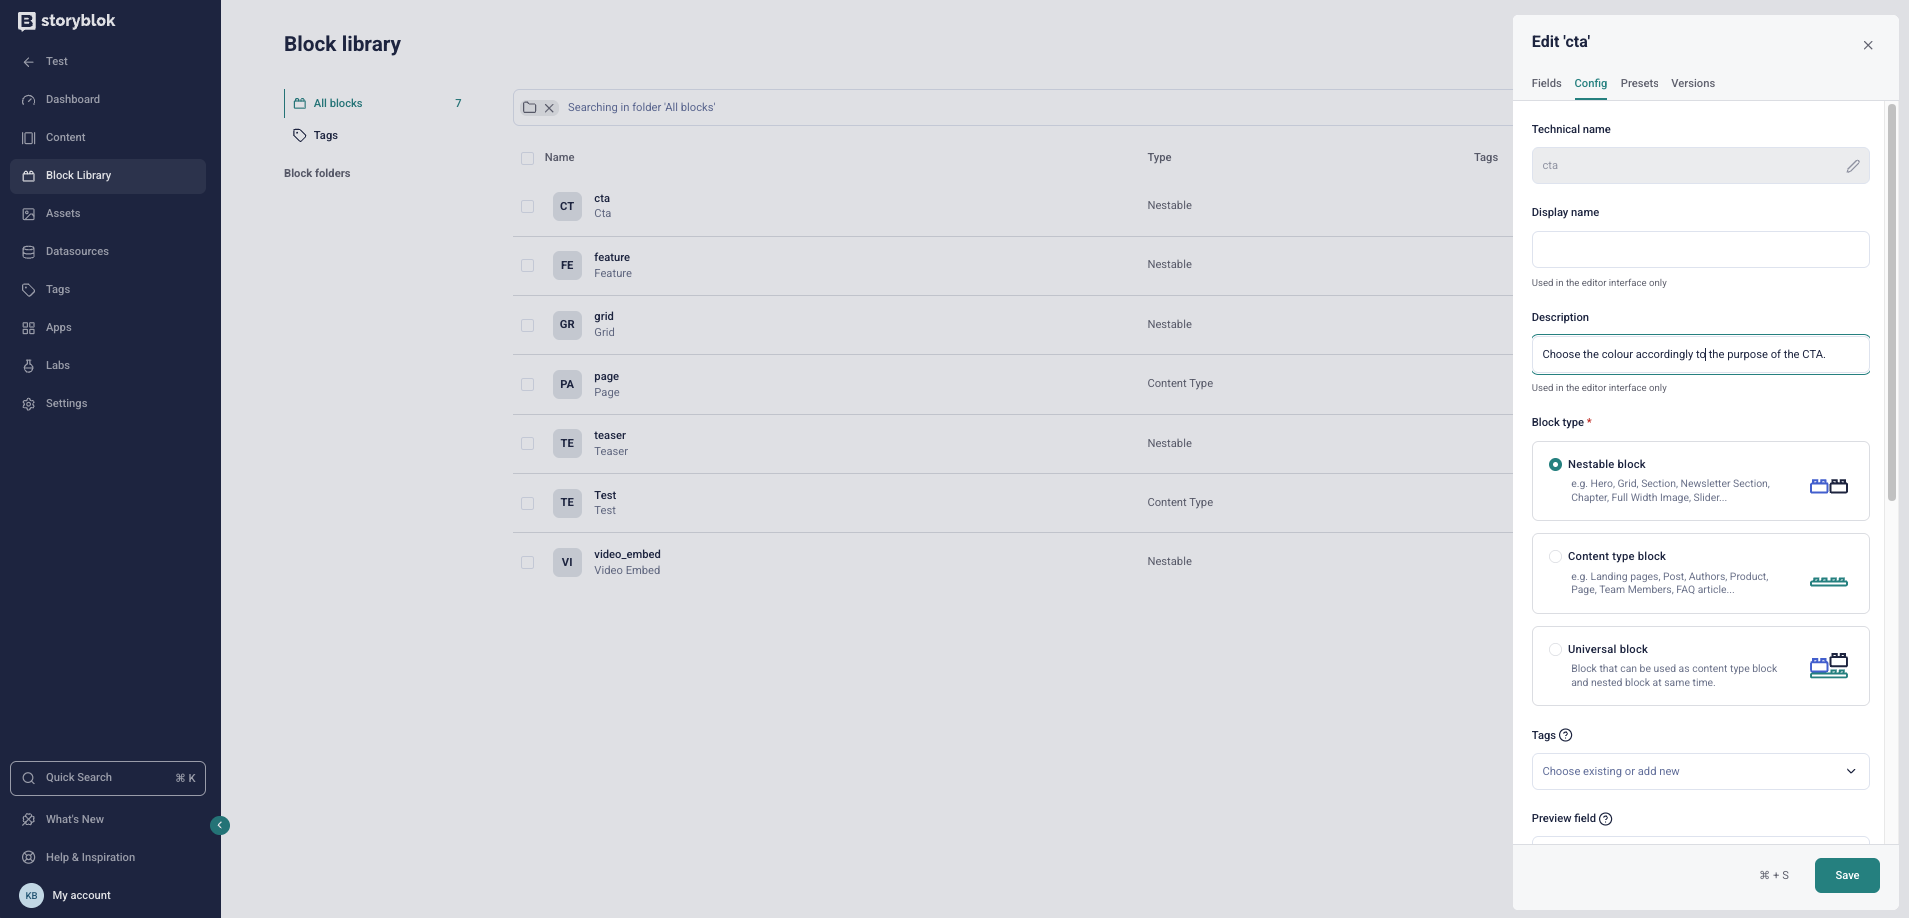
To avoid this, in Storyblok, you can limit color options for your editors using an option field (1) instead of a color picker, which will give authors a dropdown with a list of choices that you can manually set.
This way, you can have flexibility and control at the same time, and you can be sure that any color chosen was previously tested with a contrast checker tool (opens in a new window) and approved by your designer.
5. Provide editor notes
In Storyblok, you can give your editors some notes on how to use the fields you created for accessibility features by using the description attribute (1) that can be set in the field’s settings.
For example, in the context of a component containing an image, you can explain what alt text is and provide an example. You should try to keep the description as short as possible because this text will appear right below the field in the visual editor, so it might push down the other fields if it’s too long.
6. Establish landmarks
Landmarks (opens in a new window) help communicate the structure of a page and are a key part of an accessible experience. To maintain consistency and usability, authors should not be able to modify these structural elements.
With a headless CMS, landmarks can be fully managed in the application code rather than the content itself. If you are also generating some regions, you can include extra fields to set the name of those landmarks in your components.
7. Don't forget performance
Maintaining strong website performance also supports accessibility. Slow-loading pages can be difficult or impossible to use for some users, particularly those on limited or unstable connections, making performance an important part of an inclusive experience.
While using a headless CMS doesn’t automatically guarantee faster performance, Storyblok helps support this goal through a high-performance CDN API for content delivery and a built-in image service designed to optimize loading times.
To dive deeper into performance optimization, check how to increase the page speed with Storyblok.
8. Educate your team
The number of developers and editors who are well-versed in the topic of accessibility is relatively small, so education is crucial when you want to build an accessible project.
Without the right guidance, developers may overlook accessibility considerations when creating new components, and editors may unintentionally introduce issues — such as failing to follow heading hierarchy or missing meaningful alt text for images.
Accessible websites have a real, positive impact on people’s online experiences. Helping teams understand this impact — and the value their work delivers to users with accessibility needs — is key to building long-term commitment. Demonstrating how assistive technologies interact with web content, for example, through short videos or live demos, can be an effective way to build awareness and encourage more thoughtful, inclusive practices.
Takeaway
Using Storyblok can simplify the implementation of accessibility features and provide a strong foundation for continued accessible delivery. When combined with headless flexibility, strong enablement training, and the right code implementation, it becomes much easier to deliver content that works well for a wide range of users, regardless of the technologies they use to access it.
